
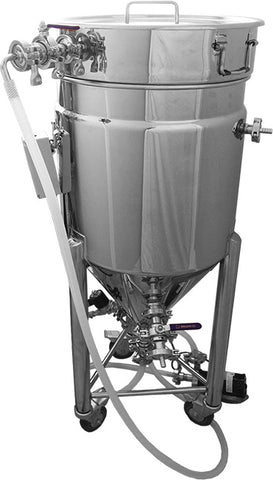
The BREWHA BIAC complete brewing system provides brewers with a more enjoyable brewing experience by giving maximum control and superior results while simplifying the brewing process and reducing equipment requirements, space, and expense. All of the brewing (heating, mashing, boiling, chilling, fermenting) occurs in just one vessel, the fermenter (the Mash Colander is inserted inside the fermenter for mashing), and the entire brewing process with full mashing and cleaning can occur in under 5 hours. The following instructions provides a simple overview of the BIAC process (for more complete instructions on how to brew see page 46-54 of the manual; or watch this video on how to brew) and instruct you on how to make your own world-class beer. While the images show the Large BIAC, the instructions apply to all sizes of BIAC brewing system.

1. Heating: Water for removing sugars from the grain (in a process called 'mashing') is added to the fermenter (3-in-1 conical fermentor or 4-in-1 conical fermentor) and heated with the stainless electric immersion heating elements to approximately 7°C/14°F above the mashing temperature. The water is called the 'strike water' and this initial temperature is called the 'strike temperature' (normally around 72°C/162°F) and is higher than the mash temperature because when grain is added, it will cool the water to a typical mash temperature of around 65°C/150°F ). The strike water volume is based on the desired final batch size, plus losses to grain absorption during mash (1lb of grain absorbs approximately 1lb of water), plus water lost to evaporation during the boil (generally 5-8% of the total volume). While each recipe will differ, the strike volume is approximately 1.25-1.75 times the final amount of beer you are making, so for a 10gal/38L batch of beer, the initial volume will be approx 12-17gal/45-64L). A portion of the total water can be withheld and added later as rinsing or 'sparge' water at the end of the mash period as the Mash Colander is being lifted out of the fermenter. While this sparge step is not absolutely necessary, it can improve the recovery of sugar from the grain. As a general guideline, the sparge volume is about 10-20% of the full boil volume.
Heatup to strike temperature: 30-60 minutes (can be completed overnight by setting the ETC temperature sensor and controller or Brewery Touchscreen Power Controller to the correct temperature; in the morning the water temperature will be ready to go—and if your water is chlorinated it will have time to gas off)
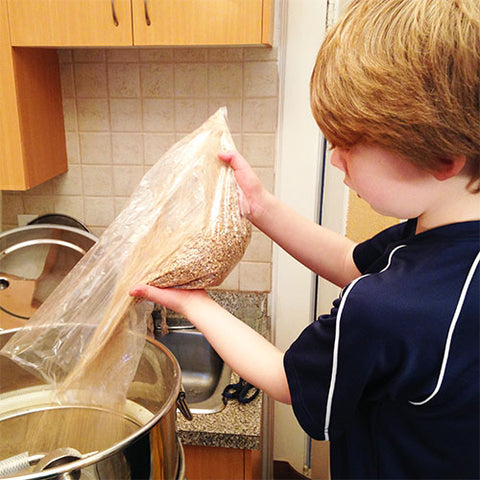
2. Mashing: The Mash Colander is inserted in the fermenter and grain is added. Using the following steps helps ensure the smoothest mash period possible.
First, have a proper crush — the Crankandstein 328G 8” fully geared roller mill on factory setting for gap (1.2mm) is the best we have seen for producing a consistent crush that gives great grain bed fluidity and great mash efficiency.
Second, add the base malts in first (they don’t tend to pulverize as many specialty malts are roasted/toasted longer which leads to further crystallization and when crushed, turns to powder)
Third, sprinkle the malts, don’t dump them in. Add them in such a way that they settle into the water without clumping. This reduces the need for mixing with the Mash Mixer.
Fourth, near the end of adding malt, if there is some floating or clumping, use the mixer only in the top half of the Colander; after this, it is best to not stir or mix again (I have mentioned before mixing during the mash but with a good crush this is not necessary and only risks pushing more grain down through the Colander, onto the element)
Fifth, let the grain sit for 10-15 minutes before starting the pump (let the grain fully absorb water and expand)
Sixth, remove grain settled to bottom of Colander manual (e.g. with a bucket out of the bottom port) and then connect the pump hose
Seventh, open the brewery b pump discharge valve slowly and follow the flow recirculation rate given in the manual.
Eight, for added safety, turn the element(s) off any time you are adding or mixing malt
Ninth, during the mash, keep the heating element output low (e.g. 20% is generally more than enough to maintain temperature)
If the wort level in the Mash Colander rises the flow of wort from the pump should be slowed (see next step). If the wort level rises but does not drop, there might be a 'stuck mash' (the grain is preventing water from passing through), which might require slowing the flow of wort from the pump (see next step) and stirring to reduce compaction. (This blog discusses more tips on preventing a stuck mash.)
Depending on the power of the pump, wort flow generally needs to be throttled (by partially closing a downstream valve) in order to ensure that the grain bed does not compact and that the element does not become exposed. This is particularly true when using the powerful commercial brewing pump. The flow rate will depend on the 'fluidity' of your grain bed which is primarily a factor of your crush size—a small crush produces more 'fines' that plug up the bed and slow the flow rate. Water should cover the element at all times.
Mashing: 60-90 minutes
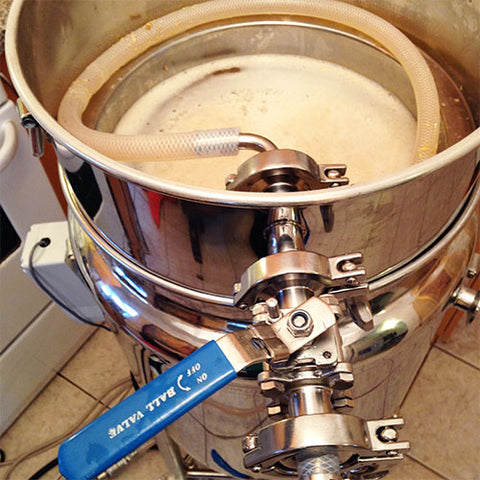
3. Vorlauf (circulating the wort out of the bottom of the fermenter and back in the top of the Mash Colander)—or out of the the side racking port if grain at the bottom is plugging the pump, or grain can be removed and transported manually back up before connecting the pump hose) typically occurs at the end of the mash period to help clarify the beer. The grain inside the Mash Colander forms a filter that captures small grain particles as wort passes down through the grain bed. Minimizing the amount of grain in your boil, will help your beer taste better. If the pump plugs with grain, after mashing in, before turning the pump on first remove the grain at the bottom of the fermenter before attaching the pump hose. The Hose Float over the end of the return hose inside the Mash Colander will help the end of the hose from sinking to the bottom of the fermenter.
Vorlauf: Last 15-45 minutes of the mash
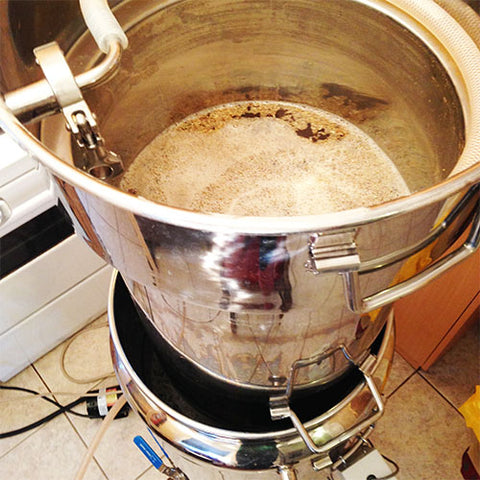
4. When mashing is complete, the Mash Colander is lifted out by hand or with a Kito chain hoist (with a good quality hoist it is possible to raise it slowly) using the Lifting Cables or Beam and the lower handles folded out to rest on the top of the fermenter (the larger Mash Colanders will be suspended throughout this process by the hoist). The wort drains from the Mash Colander and runs into the fermenter in a process called 'lautering'. 'Sparge' water can be added to rinse the grain and increase boil volume. Fresh water for sparging can be added as the wort level drops, maintaining a ~1" layer of water on top of the grain bed. It is generally recommended that sparge water be 75°C/167°F to increase the 'fluidity' of the grain and wash out the sugar more readily, however, cooler water can be used. Sparge water can be measured using the Water Flow Meter. At this point the Stainless Electric Immersion Heating Element is turned on to heat the wort up to boiling. (See this blog for instructions on lautering and this blog for suggestions on how to sparge with the BIAC.)
Lautering and Heatup: 30-60 minutes
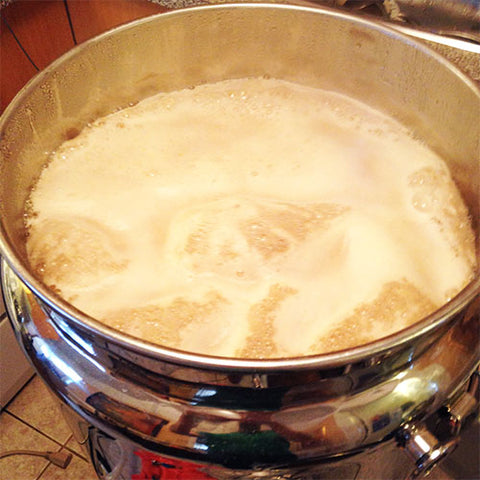
5. Boiling: Boiling improves the flavor and kills microbes. Hops can be introduced after hot break using the Hop Basket or the Heavy Duty Hop Spider. Early addition or 'boil' hops provide bitterness to balance beer sweetness, and late addition or 'aroma' hops provide flavor/aroma. Once boil is achieved, to prevent boil over and reduce evaporation, the element power output can be turned down to approx 50% on the Tabletop Brewing Power Controller or Wall-mounted Touchscreen Electric Power Controller.
Boil time: 60 minutes
6. Chilling: Once boiling is complete, a chilling liquid (e.g., cold tap water) is ran through the fermenter jacket. It is important to keep pressure of chilling media in the jacket below 5psi (7psi in the 4-in-1) or the vessel could damage (keep main vessel body below 3psi in the 3-in-1 and 14.9psi in the 4-in-1). No restrictions should be placed on the outflow of the jacket or pressure could build up and care should be taken that no restriction can impede flow (e.g. a hose kinking or valve accidentally closing). A Water Pressure Regulator can be purchased to help ensure pressure does not build up in the jacket. The lid should be installed to keep out airborne contaminants, but a port should be kept open to air during the cooling period, as a vacuum could form as the water cools, damaging the fermenter. A Pressure and Vacuum Relief Valve should always be installed as backup protection to help protect the inside of the vessel. (If for some reason the fermenter needs to be sealed, add a few psi of CO2 to offset a vacuum that will form as water cools and contracts.) Don't throttle the flow rate too much as a good flow rate is necessary for faster chilling (the greater the temperature difference between the water leaving the jacket, the faster the chilling rate). If municipal water is warm, it could be used for the majority of cooling (e.g. down to 30C/90F), and a Lindr Brewery Water Chiller used for the rest.
Chilling time: About 30-60 minutes for the Small-Large BIAC (depending on chilling water temperature and flow rate).
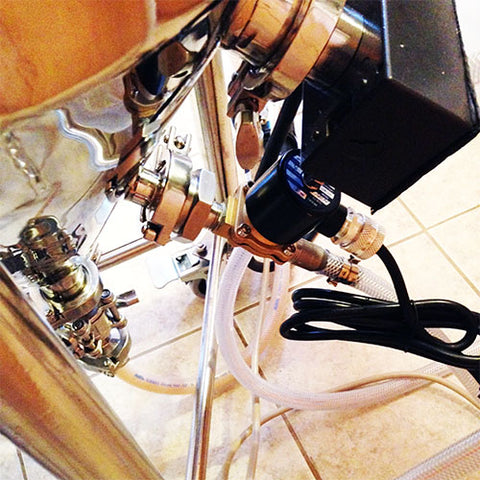
7. The Temperature Control Valve 120V solenoid is used (in conjunction with an ETC temperature sensor controller) to regulate water into the fermenter jacket. When the target temperature is attained, the controller valve closes and the flow of fluid into the jacket is stopped. This is useful during the initial chill, so one can program the desired pitching temperature and not have to supervise it, and during fermentation to precisely maintain temperatures inside the fermenter. The ETC can also be used to power the Brewery Water Chiller pump instead of opening the TCV (watch this brewery chiller video for details starting at 6:30)
8. Fermenting: When the wort reaches yeast-pitching temperature (Note: do NOT put any closure on fermenter port during fermentation as a vacuum or pressure build up may occur and deform the vessel) the protein that has settled to the bottom is removed out the bottom port (generally this is 1-2% of the total volume). To facilitate healthy yeast growth at the start of fermentation, oxygen (or clean air) is added through the bottom port with an Brewery Aeration Stone. The addition of oxygen in the bottom also helps equilibriate the temperature inside. The temperature is checked again to ensure it is correct for adding yeast; if so, yeast is pitched, the gas blow-off hose connected to a lid port (with the other end in a bucket of water on the floor is better than placing it on the lid) and the lid is sealed.
Rest to equilibriate temperature and remove excess protein, and aeration before pitching yeast: 10 minutes
Fermentation: 5-14 days (longer for lagers or high gravity beers)
Transfer to kegs (or bottles) with the Fermenter to Keg Racking Hose for further conditioning and/or carbonation: 15 minutes
Cleanup of equipment: 15 minutes
And that's it. Full control, brilliant tasting beer, and all in less space and with less equipment than ever before.
If you have any questions, we would love to hear from you!
Read the full BIAC beer brewing system manual here
Bottling beer from a BREWHA conical fermentor
Transferring or racking beer from the fermentor to a keg diagram or video on cleaning and filling beer kegs

Carbonating beer in the 4-in-1 conical (Microbrewery) fermenter
BIAC complete microbrewery product page
12 comments
Hi Chris — thank you for your question. Most customers find 15 minutes is enough time, and this is one of the many benefits of the BREWHA system. Cleanup on brew day amounts to rinsing off the Mash Colander and pump hoses — a few minutes at most (since both of these items are pre-boil a rinse is all that is necessary; and the pump hoses can even be rinsed by running sparge water through them). Once the beer is out, spraying/wiping down the inside of the fermenter (the fermenter empties through the bottom valve into a floor drain or pot that can be dumped into a sink), cleaning off the elements well by wrapping a stainless safe scrub pad around the element and running the length of the element, and disassembling the valves to rinse out and then reassembling them is all that is necessary and can be completed in about 10 minutes.
Really excited by the possibilities! The only ting I question is the following:
“Cleanup of equipment: 15 minutes”
I would love to learn more about there cleanup, as in my experience that is one of the messiest and most tedious parts of the whole process. Especially when using the “Carbonate and serve direct” method, I expect that cleaning out once the brewer is empty would be quite a challenge…
Hi Ryan, you can see the various sizes on this website and you can see our customers who have offered to host workshops in the ‘Learn’ section. If you have questions you can’t find answers to on the website, feel free to email us at brewing@brewha.co
Hello there I am in Vancouver Canada and saw a quick portion of a video that had a larger system than what is talked about here in this article. What is the largest system you sell, how much and is there one here in Vancouver that I could see, thank you Ryan 778 298 BREW (2739)
Hi Jason, we would be happy to discuss this with you. Please email us at brewing@brewha.co, fill out the form on the Question? page, or give us a call and let us know how we can help.